QooL GameQ Monitor V3 is a tool to inquiry the status of Your favorites game servers and on-line players. The program is highly customizable both in content and appearance.
In order to inquiry it uses latest PHP GameQ class. To be honest it can query not only quake 3 server but a long list of server how documentated in the Austin Bischoff Github.
The source code of QooL Monitor was written line by line using MS Visual Code editor and for also Notepad++: PHP, Pure Javascript, HTML and CSS.
It is not full responsive but enoght for different screesize devices.
MAIN FEATURES
- Custom Servers List
- Connect to Quake 3
- Auto Refresh (see settigns)
- Skins
- Custom CSS or URL
- Different Boxes size
- Search (Server, Player, Map 3)
- Filter for Humans Only
- Sort by Humans descending
Other features
- Backup and Restore Settings (V3.16 - 27-10-2019)
- Image Zoom
- ESC Key
CUSTOM SERVERS LIST
In order to use your favorite custom servers list, QooL Monitor offers there are 3 ways:
- Write a comma separated list in the textarea
- Type an url to a remote file that contains the comma separated list
- Use a url to a remote file as argument in the url
1# Comma Separated List
If you never customize the list, you will not see the default list of server...you can click on Load QooL Fav button to load an example. You can edit the list removing, adding, sorting. You can click on preview to show the new list before save or save to confirm.
Server type can be quake3 or quakelive. the list is a simple comma separated:
Description, Type, Server Address. Port
- EXAMPLE
QooL7,quake3,quakearea.com,27960
Starfish FFA,quakelive,213.136.94.235,27960
2# URL to a remote file in the textarea
Other way is to create a text file with inside the list and put it accessible via http or https (store in a webserver or share it wth your cloud). Put the url file in the textarea instead of the list some examples:
3# Argument Link in the URL
You can leave the list of server in the text area and use your file as argument in the url
Examples
- https://www.quakearea.com/mon/#q=https://www.quakearea.com/mon/QooL-New.txt
- https://www.quakearea.com/mon/#q=https://www.quakearea.com/mon/QooL-Q3Msk.txt
- https://www.quakearea.com/mon/#q=https://www.quakearea.com/mon/QooL-7.txt
CONNECT TO THE SERVER
Play Icon
In order to use the "Play Icon" to connect to a server you need:
- Configure an URI Protocol on your PC
Manually or an easy way using my tool QooLRun.Exe - On Monitor Option select the protocol name created
URI Scheme Protocol
If you configure your pc as explained here, you will be able to click on the "Play Icon" and monitor will connect to the server quake 3 using your fav quake3 client.
Others games are not tested/supported.
QooL Monitor will use a custom URI Scheme, something like the well-known http:// ... or ftp://. In my case I created qool:// so to connect to the server qool7.quakearea.com, QooL Monitor will create in the "Play Icon" the link qool://qool7.quakearea.com
In order to create the URI SCHEME PROTOCOL in your PC you can run my QooLRun.exe, maybe as administrator:
- Type "qool" in the URI Scheme field
- Click on "Create URI Scheme"
QooLRun is my own vb net application created ad hoc for this scope.
QooLRun.exe has 2 main features:
- Initial setup (create the URI scheme protocol and set the quake3 client to run)
QooL Run make easy the registration of a new URI Scheme. - It will be the "bridge" between the monitor webpage and your quake3 client.
When the uri scheme like qool://serveraddress:port is invoked, QooLRun.exe will be launched from windows and it will run the specified Quake3 client.
QooLRun will write in the Windows Registry something like this:
Windows Registry Editor Version 5.00

[HKEY_CLASSES_ROOT\qool]
@="URL:qool Protocol"
"URL Protocol"=""

[HKEY_CLASSES_ROOT\qool\DefaultIcon]
@="C:\\tools\\QooLRun\\QooLRun.exe"

[HKEY_CLASSES_ROOT\qool\shell]

[HKEY_CLASSES_ROOT\qool\shell\open]

[HKEY_CLASSES_ROOT\qool\shell\open\command]
@="\"C:\\tools\\QooLRun\\QooLRun.exe\"  \"%1\" \"%2\" \"%3\" \"%4\" \"%5\" \"%6\" \"%7\" \"%8\" \"%9\" "
DOWNLOAD
SKINS
Not sure if the right name is skin but it looks so. Some colors skins are ready to use. Just open the settings and choice one. Not always the resul is full visible, so a refresh page is suggest.
The skin is also selectable using the url argument s=skinname. The below link will open the monitor with the red skin.
https://www.quakearea.com/mon/#s=red
https://www.quakearea.com/mon/#s=white
CUSTOM CSS OR URL
In the settings there is a textare where you can add your custom css or a link to an external file css.
For example you could use a skin and change the background. the below example will set the background.
/*  Quake3 skin - background collections */
    .background {
        background-color: #000000;
        background-image: url(https://www.quakearea.com/site/templates/protostar/images/q3_bg_skin.png),radial-gradient(#ba0e19, #1c0202);
        background-image: url(https://www.quakearea.com/site/templates/protostar/images/q3_bg_skin.png),radial-gradient(#cac9c9, #000000);
        background-image: url(https://www.quakearea.com/site/templates/protostar/images/q3_bg_skin.png),linear-gradient(to right bottom, #43b581, #00b3a2, #00afc0, #00a7d7, #009ce1, #3d8ed1, #5280c0, #5e72ae, #51618e, #455170, #3a4152, #2f3136);
    background-image: url(https://www.quakearea.com/site/templates/protostar/images/q3_bg_skin.png),linear-gradient(to top, #43b581, #00b3a2, #00afc0, #00a7d7, #009ce1, #3d8ed1, #5280c0, #5e72ae, #51618e, #455170, #3a4152, #2f3136);
}
You can also use a link to a css file stored in your cloud or website but not both, I mean you can use css or link and NOT css and link.
Try to copy and paste the following url in the "Custom CSS or URL" field
https://www.quakearea.com/mon/css/skins/style-debug.css
CUSTOM CSS EXAMPLES
Example 01
/* EXAMPLE 1# - Small Boxes */
#myListSearch {
min-height: calc(100% - 184px);
}
#serversStatus.boxes>div {
width: calc(15% - 56px);
}
#serversStatus.boxes>div:not(.emptyBox) {
margin-top: 40px;
margin-bottom: 0px;
}
#serversStatus.boxes>div,
.footer>.boxes>div {
font-size: 90%;
font-weight: 200;
}
Example 02
/* EXAMPLE 2# Dirty Background */
.background {
background-image:url(https://www.byman.it/downloads/Netshare/Images/Textures/dirt-png-43617.png),
linear-gradient(to right bottom, #9b5d03, #6c5600, #454a06, #263b11, #112a15, #0f2410, #0e1f08, #091a00, #1b1c00, #2d1c00, #411600, #550202);
}
Eample03
/* EXAMPLE 3# Shtayga Background */
.background {
 background-image: url(https://4.bp.blogspot.com/-Cii7JS0ZT9M/W8NisiKMUrI/AAAAAAAABdY/B_r9iV7WCLMkBNa6Wyj8tG3_MBFFjgZHQCK4BGAYYCw/w1600/idee3.jpg);
 background-size: cover;
 background-attachment: fixed;
}
Example 04
/* EXAMPLE 4# Fire background + gradient color red */
/* You should try removing filter and transform */
/* https://mycolor.space/gradient3?ori=to+bottom&hex=%231A0000&hex2=%23370000&hex3=%23622600&submit=submit */
.background {
    background-color: #5d0401;
    background-image:url(../../images/bg_fire.png),url(../../images/bg_fire.png), linear-gradient(to bottom, #1a0000, #200100, #260200, #2b0200, #300200, #360402, #3d0503, #430603, #4b0d04, #531503, #5b1e02, #622600);
    filter: blur(6px);
    transform: scale(1.1);
}
Example 05
/* EXAMPLE 5# - URL to css file
For a better result you should set the Box to Horizontal
This example is real nice, the background will be changed automatically.
A random levelshot will be used as a blur background. TRY IT!
*/

https://www.quakearea.com/mon/css/customcss/custom-backgroundauto.css
BOX SIZE
In the left menu there is a section that allow to change the box size:
- Smaller
- Small
- Image (levelshot)
- Playes
- Scale
- Horizontal
- Default
You can also set it using the url argument b=NameOfBoxHere
EXAMPLES
- https://www.quakearea.com/mon/#b=horizontal
- https://www.quakearea.com/mon/#b=scale
- https://www.quakearea.com/mon/#b=small
OTHER FEATURES
Backup and Restore
Starting from version 3.16 you can make a backup of your settings for a safe restore or just to apply the same settings to another browser or to an another pc.
BACKUP
Just click on Backup button, copy the settings that will be appear in the textarea.
RESTORE
Just paste the settings and click on Restore button
Image Zoom
Clicking on the image to frame will be scale of 1.3, To unzoom just click again in the the image zoomed or press the ESC key.
ESC Key
You can use ESC key to close the settings panel, the side menu panel, to unzoom, to reset the search. It use an history and go back 1 action at time.
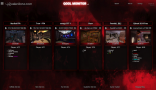
SCREENSHOTS
Here you will find some screenshots useful to see how Monitor works or how configure it.
Note: some screenshotes may different from the current version.
GENERAL


SKIN


CUSTOMCSS


BOXES SIZE


Heartfelt thanks
A very special thanks to all developers of some software used on Monitor, and also to all resources available online like tutorials, snippets, forum, blogs, wallpapers and so on.
Here some codes used as php classes, javascript plug-in
- GameQ
php class for standard server like Quake 3, Quake Live and more and more other games - Spider
php class for Excessive Plus Quake 3 Servers - LvL World
API for maps title - Swiper
Javascript plug-in for Horizontal Scroll - List.js
Search for boxes and Human Filter - Horizontal Momentum drag
Used on Small/Smaller/Levelshot Images and Players boxes type. - IP Location Lite
Country for flag - Flag Icon CSS
- Toast Message
Message box on bottom
Here some great resources
Special thanks to Testers
CHANGES
Here you will find a list of changes done starting from version 3.1.6. They could not be reported in the above documentation.
3.1.6 - 27-10-2019
- Settings: Backup and Restore
It means you can export and import in another browser/device or just to restore settings when you reinstall your pc or browser or because you cleared the browser cache.
3.1.7 - 25-01-2020
- Score Team Players
3.1.8 - 31-01-2020
- Screen Media for small screen width 1366: smaller boxes and font reduced for horizontal boxes
- Levelshot image: if not exists in the server, it will be searched on the external server Worldspawn at address ws.q3df.org.
An icon on left-top of image will be shown to indicate the external map. - Balance info for tdm: how many players in red and blue team
3.1.9 - 12-02-2020
- Server Info
An icon is shown on the right of the server name. On click a transparent full box will shown with info about server. - Score Time: when available on server will be reported on the levelshot image the left time
3.2.0 - 16-02-2020
- Server List, Address Port now can be specified in the format address:port in alternative of address,port
QooL7 FFA,quake3,quakearea.com:27960
OR
QooL7 FFA,quake3,quakearea.com,27960 - On refresh the current search is kept.
- Some improving on internal php source.
3.2.1 - 27-02-2020
- Servers List, a better use of source.
Servers List can be provided from
- Default server config
- From user settings, textarea with list comma separated or url to external file text
- From ?q= url argument
Start from this release, when user click on server list button server Monitor remeber last action and will use it on next refresh (button or scheduled) overriding all source. A browser reload (ex F5) will reset the last list used and will use the list specified. - Servers Button List will not reload all page using url argument but using ajax, so any filter will be mantained.
- Search field now has a data list as suggestions
3.2.2 - 29-02-2020
- Skin Options and New Skin:
- skins are now grouped by category
- started a reorganizing of skins, splitting in basic and inhering type
- New frosted skin joins to Basic category where already there are none and organic
- New wp-game and wp-sporbright inhering from frosted with random background image
3.2.3 - 07-03-2020
- New flag for country server location
- Game Type Icon moved over the levelshot
3.2.4 - 28-08-2020
- Collapsible boxes for Box size: Smaller, Small and Players.
- Clicking on expand icon or title will appear the full box and icon will come compress to allow you back as previous.
- Box Size are saved on localstorage so when page is reloaded will be show the previous status.
- In order to cover all page, the boxes are managed using the css column-width for the wrapper div and display-inline for boxes div.
3.2.5 - 05-09-2020
- Settings->skin: dropdown now shows a thumbernail as skin preview.
3.2.6 - 28-10-2020
- Map Title on mouse over the map name.
Let me say thanks to ws.q3df.org API.
3.2.7 - 15-01-2021
- Map Title added on top of image level
3.2.8 - 06-03-2021
- Wallpaper Skin revisited: levelshot background @auto is now applied also to wp- skins. background random will be changed for each refresh.
- have fun -